Human Character Model

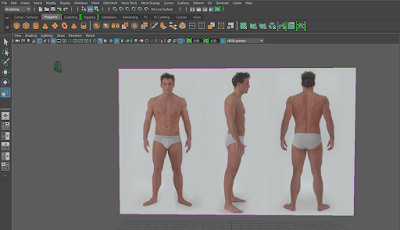
In order to start the creation of a 3D model a reference image is needed to help construct a model with respective proportions that are realistic, and therefore an image plane is created which provides the modeller to have a 2D image on the Maya workstation that they can work off of. Here you can see my image plane as a reference, created by going into the create tab and adding a photo from file that i had already collected.
Using a cylinder polygon and adding subdivisions to turn it into a octagonal cylinder which is much easier to work with. After doing this i then matched up the outline of the polygon to the reference image to get the correct height for the torso.
Using the scale and move tool i then moved each row of vertices of the octagonal cylinder to match up to the dimensions of the reference image, this forming the torso of the character.
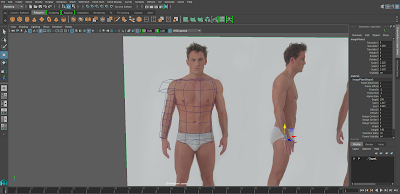
Once the torso was finished I then moved onto the arm, which was done using the same method as the torso, yet being resized to match up to the reference images proportions. The only difference with the arm and the torso in terms of being a polygon other than the scale, is the added two rows of vertices to allow for the arm to be more detailed.
Next i made sure that the arm was in the correct place, and deleted the top row of faces from it, this is where the shoulder would normally be. However in order to connect the arm to the shoulder you have to extrude the faces from the side of the torso to create the shoulders and something for the arm to connect to.

Here is the faces of the torso being extruded to their position. By extruding the faces twice, it creates enough verts for their to be a perfect match up between the arm and the torso/shoulder.
I then combined the meshes together once in place to turn them into the same object, but then however used the welding tool to add the vertices of the arm on the top to the bottom vertices of the shoulder in order to connect them as one object.
As you can see here i have also resized the shoulder so that it has the realistic proportions like the image reference. This was done by using the move tool and moving the vertices on top of the shoulder to the correct area, also rounding off the top of the shoulder.
Once i had completed the arm, i moved onto the leg which again was created in the same was as the torso and the arm, using a move tool to match up the vertices to the image reference.
You can see here i connected the leg to the lower portion of the torso, thus forming the pelvic region. This was again done in the same way as i connected the arm to the shoulder, using the welding tool.
After finishing the leg i decided to mirror the body so that i could see a full body, a trick used to make sure that the left and right side of the body are symmetrical without having to make both sides separately. To do this i went into the mesh tab and chose mirror geometry whilst having my mesh selected.
Here is the mirrored piece, sometimes you may have to adjust the geometry however as it does not always match up to the reference image.
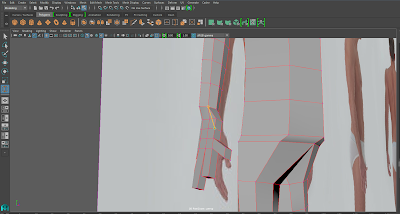
Once i had mirrored my body i then started work on the hand, which is made from a square re-scaled and having 4 subdivisions in height and weight to allow me to extrude the fingers from the faces.
After extruding the fingers on the hand i then matched it up to my reference image as best as possible ready to connect it to the arm/body.
By adding another vertex using the bevel tool i was able to connect the hand to the arm like i connected the other body parts, using the weld tool.
The same was also done with the feet, modelling them off of a square that i had extruded at the ends in order to create the toes then elongated in order to produce some long clown feet.
For the head i used a cylinder like i used for the torso, however moulded it by extruding the faces at the bottom to create a long chin, with the head however one i had connected it and was done, turned it along with the rest of the body into a smooth mesh, this making the model look a lot better as it has the realistic smooth texture/sculpt that a human would have.
The final product that I ended up with was a clown that will be used in my game, i have elongated his fingers to simulate knives and also placed him in an orange jumpsuit to represent him being a prisoner that was once human, but has since been turned into a psychopathic clown who is on a murderous rampage. I am happy with how the initial model turned out, as it replicated the look i aimed for. I wanted to create a large lanky clown, that would tower over the normal player, in order to do this i raised his height in comparison to the initial reference image to make sure he was tall with the scale tool. The structure of his head represents a typical clown look, through the extrusion of his chin making it longer than that of a normal person. The art style is cel shaded like my game and was done through changing the colours on the specific faces of the model, such as the torso/arms, hands, head and feet to create the clear sections of his clothing. If i was to re do this character i would most likely spend more time on his head, as that is the most basic part of the model and does not have too much detail. Adding more detail would overall improve the model and make it look more realistic.


